Repairing a Leaking Kitchen Mixer Tap
A leaking kitchen mixer tap can be a frustrating issue that disrupts your daily routine and wastes precious water.
While it may be tempting to tackle the repair yourself, it’s important to understand that plumbing repairs can be complex and require specialised knowledge and tools. In many cases, it is advisable to call a professional plumber to ensure a safe and effective resolution.
If you’re planning to fix a leaking mixer tap, it’s essential to consider the potential risks and challenges involved. Plumbing systems can be intricate, with various components and connections that require careful handling. Incorrect repairs or a lack of expertise can worsen the problem, leading to more extensive damage and costly repairs down the line.
Professional plumbers possess the necessary skills, experience, and tools to diagnose and repair kitchen mixer tap leaks efficiently. They can identify the root cause of the leak and provide a long-lasting solution that ensures optimal functionality. Additionally, licensed plumbers are well-versed in local plumbing codes and safety standards, ensuring a job that meets all regulations.
What is a Mixer Tap?
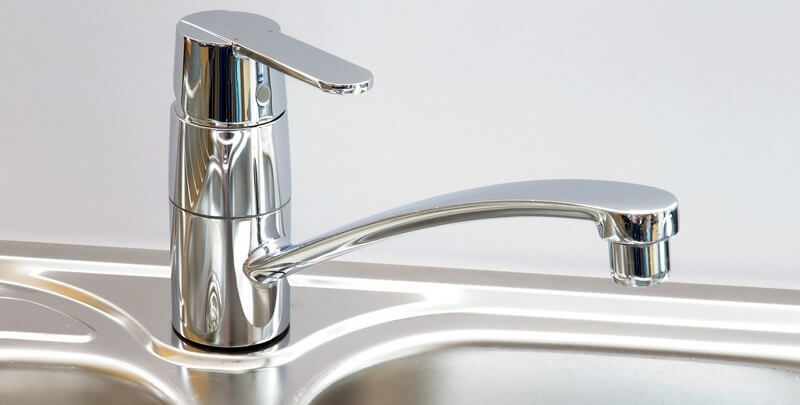
A mixer tap is a commonly used fixture in kitchen sinks that combines both hot and cold water streams to provide a single, adjustable water output. It consists of two separate handles or levers, one for controlling hot water and the other for cold water.
By adjusting these handles, users can achieve their desired water temperature for various tasks such as washing dishes or filling a pot.
The mixer tap is designed to blend the hot and cold water streams within the tap body, resulting in a smooth and controlled flow of water from a single spout.
Components of a Kitchen Mixer Tap
To effectively repair a leaking kitchen mixer tap, it’s important to understand its key components.
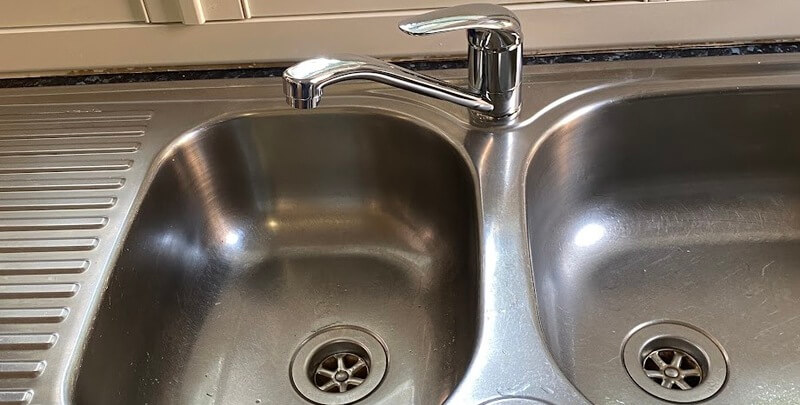
The tap comprises several essential parts, including the spout, handles, cartridges, and the body. The spout is responsible for delivering the water, while the handles control the flow and temperature.
Cartridges play a crucial role in regulating water flow and mixing cold and hot water. Inside the tap body, there are seals and O-rings that prevent leaks.
Familiarising yourself with these components will enable you to identify the source of a mixer tap leak and carry out the necessary repairs more effectively.
Assessing the Leak
When faced with a mixer tap, it’s crucial to assess the issue accurately. Start by examining the area around the tap to identify any visible leaks or water puddles.
Check for dripping water from the spout or handles. Next, observe the water flow and temperature control. A leak can occur due to worn-out cartridges, loose connections, damaged seals, or faulty O-rings.
Take note of any unusual sounds or reduced water pressure. Assessing the leak thoroughly will help determine the specific component or area that requires attention, making the repair process more targeted and efficient.
Tools and Materials Required
To successfully fix a leaking mixer tap, gather the following tools and materials:
- Adjustable wrench or spanner: For loosening and tightening connections.
- Screwdriver set: To remove screws and access internal components.
- Replacement cartridges: Essential if the leak originates from worn-out cartridges.
- O-ring kit: To replace damaged O-rings that may be causing the leak.
- Plumbers tape: Helps create a watertight seal when reassembling the tap.
- Cleaning cloth: To wipe away dirt, debris, and excess water.
- Bucket or basin: To catch water during the repair process.
Having these tools and materials ready will facilitate a smoother and more efficient repair of your kitchen mixer tap.
Step-by-Step Repair Process
Repairing a leaking mixer tap can be done with a systematic approach. Follow these step-by-step instructions:
- Turn off the water supply: Locate the shut-off valves under the sink and close them to stop the water flow. If you can’t find the valves or they don’t work, turn off the main water supply to your house.
- Disassemble the leaking tap: Use a screwdriver to remove any screws or covers, allowing access to the tap’s internal components. Carefully detach the handles, spout, and other removable parts.
- Inspect and clean: Examine the cartridges, O-rings, and seals for damage, wear, or buildup. Clean them with a cloth and remove any debris or mineral deposits.
- Replace faulty components: If cartridges, O-rings, or seals are damaged, replace them with new ones. Ensure you use the correct replacements for your tap model.
- Reassemble and test: Carefully reattach all the parts, following the reverse order of disassembly. Tighten connections with an adjustable wrench, but avoid over-tightening. Turn on the water supply and test the tap for leaks.
- Seek professional help if needed: If the leaking tap persists or you encounter difficulties during the repair process, it’s advisable to seek professional assistance. Certified plumbers have the expertise and experience to handle complex issues, ensuring a safe and long-lasting solution.
Remember, some problems with mixer taps may require professional intervention, especially if the leaking tap is old, severely damaged, or if you lack plumbing knowledge.
Don’t hesitate to contact a professional if you’re unsure or if the repair seems beyond your capabilities. Prioritising safety and getting expert help when necessary can save you time, money, and potential water damage in the long run.
Preventive Maintenance for Kitchen Mixer Taps
Taking proactive measures to maintain your kitchen mixer tap can help prevent leaks and extend its lifespan. Follow these preventive maintenance tips:
- Regular cleaning: Wipe down the tap regularly with a soft cloth to remove dirt, grime, and mineral deposits. This helps prevent buildup that can lead to leaks.
- Avoid excessive force: Operate the tap handles gently, without exerting excessive force. Over-tightening or forcing the handles can cause damage to internal components.
- Check for leaks: Periodically inspect the tap for any signs of leaks, such as dripping water or water puddles. Addressing leaks promptly prevents them from worsening and causing further damage.
- Maintain water pressure: Ensure your water pressure is at an appropriate level. High water pressure can strain the tap’s components, leading to leaks. Consider installing a pressure regulator if necessary.
- Replace worn-out parts: Keep an eye on the cartridges, O-rings, and seals. If you notice signs of wear or damage, replace them promptly to prevent leaks.
- Schedule professional maintenance: Consider hiring a professional plumber for routine maintenance. They can inspect your leaking tap, identify potential issues, and perform necessary adjustments or repairs.
By implementing these preventive maintenance practices, you can minimise the risk of leaks and ensure your kitchen mixer tap functions optimally for years to come.

Keep Your Mixer Tap Flowing
Repairing a leaking mixer tap is a task that can be accomplished with the right tools, knowledge and careful steps.
By understanding the components, assessing the leak, and following a systematic repair process, you can successfully fix the issue and restore your tap’s functionality.
However, it’s important to remember that certain situations may require professional assistance. Prioritising safety and seeking help when needed can save you from potential complications.
Additionally, practising preventive maintenance can help prevent leaks and prolong the lifespan of your kitchen mixer tap. By taking these measures, you can enjoy a leak-free and efficient tap in your kitchen for years to come.
Please note: This information is provided for advice purposes only. Regulations differ from state to state, so please consult your local authorities or an industry professional before proceeding with any work. See our Terms & Conditions here.