How to Change a Washer on a Leaking Shower Tap: Follow Our Complete Guide
There's nothing more frustrating than having to turn your shower taps off as tightly as possible every time. It's probably because the tap washers are worn out and in need of replacement.
Not tightening it enough will result in a dripping tap. Replacing the tap washers can be far cheaper than replacing the entire taps. When you need to change a tap washer, it can be done relatively easily with just a few small supplies from your local hardware store.
We’ve put together a quick guide that explains how to change a shower tap washer in seven easy steps. Before that, let’s get to know a bit more about the tap’s components.
Understanding the Tap’s Components
Before we get started on fixing that pesky leaking tap, let’s take a moment to understand the key components involved.
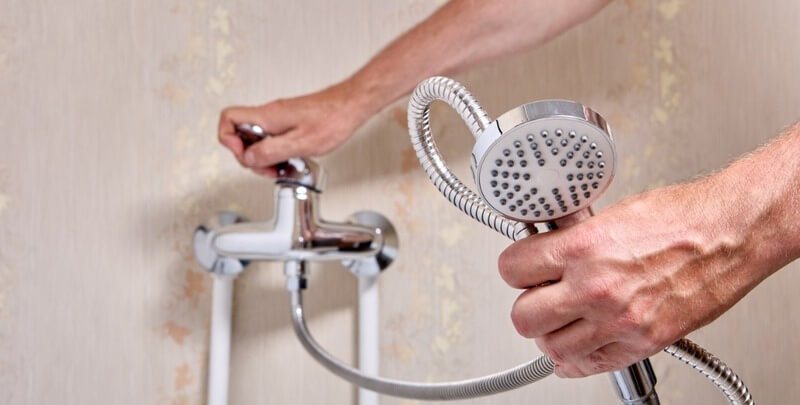
One crucial part of the tap that often causes leaks is the tap washer. The washer is a small rubber or plastic disk located inside the tap’s cartridge or valve assembly.
When you turn the tap handle, the tap washer presses against the valve seat to stop the water flow. Over time, due to constant use and wear, the washer can become worn out, cracked, or damaged. This can lead to a leaky tap, causing unnecessary water wastage and potentially higher water bills.
Identifying the source of the leak is an important step in troubleshooting. If water drips from the spout when the tap is turned off, chances are you’ve got a worn tap washer that needs replacing. This applies to old-fashioned taps and modern mixer taps.
It’s worth noting that some taps may have a ceramic cartridge instead of a washer, but the principle remains the same.
By understanding the role of the tap washer and recognising signs of a faulty one, you’re on your way to resolving the leaky shower tap issue. Let’s get started on the seven steps.
1. Gathering the Necessary Tools
Before you embark on fixing your leaking tap, it’s essential to gather the right tools for the job.
Having the correct tools at hand will make the whole process smoother and more efficient. Here’s a list of tools you’ll need:
- Adjustable wrench: This will help you loosen and tighten nuts and bolts.
- Screwdriver: Depending on the type of tap, you may need either a Phillips or a flathead screwdriver to remove screws and handle fittings.
- Pliers: Useful for gripping and turning small components, such as the tap handle.
- Replacement tap washer: Make sure to get the right size and type of washer for your specific tap. It’s a good idea to bring the old tap washer with you to the hardware store for reference.
- Clean cloth or rag: You’ll need this to wipe away any water or debris during the repair.
By gathering all the necessary tools beforehand, you’ll be well-prepared to tackle the task at hand. Remember, having the right tools can make all the difference in successfully changing the washer on your leaking shower tap.

2. Preparing for Repair
Before you start repairing leaking shower taps, it’s important to take a few preliminary steps to ensure a smooth process. Here’s what you need to do:
- Shut off the water supply: Locate the main water valve in your home and turn it off to prevent water flow to the tap you’ll be working on. This step will avoid any unwanted surprises during the repair.
- Drain the remaining water: Open the tap fully to release any remaining water in the system. This will help minimise water spillage when you disassemble the tap.
By shutting off the water supply and draining the remaining water, you’ll create a safe and dry environment for the repair. These simple steps will set you up for success and make the whole process much more manageable.
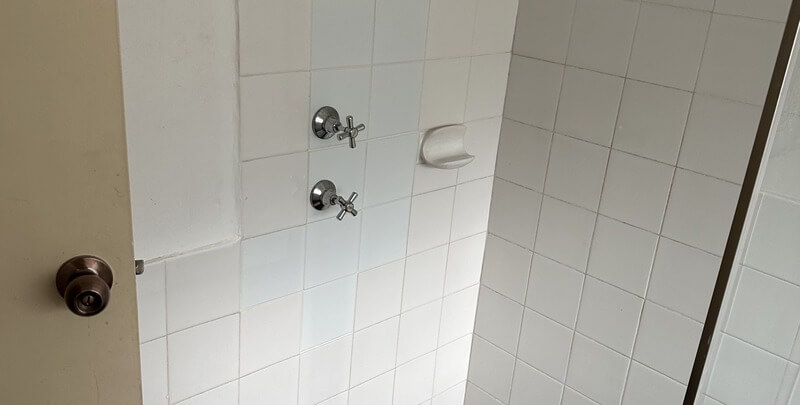
3. Disassembling the Tap
Now that you’ve prepared for the repair, it’s time to disassemble the tap and get to the root of the problem. Here’s how:
- Removing the tap handle: Look for a screw or cap on the handle and use a screwdriver or pliers to loosen and remove it. Once the screw is out, gently pull the handle off.
- Accessing the cartridge or valve assembly: Depending on the tap design, you may need to unscrew a retaining nut or use pliers to remove the cartridge or valve assembly. Be careful not to damage any surrounding components.
- Removing the old tap washer: Locate the washer inside the cartridge or valve assembly. It may be held in place by a screw or simply sitting snugly. Remove the old tap washer, taking note of its size and shape for replacement.
By carefully disassembling the tap, you’ll be one step closer to fixing the leak. Stay focused and take your time to avoid any accidental damage.
4. Selecting the Replacement Washer
Now that you’ve successfully disassembled the tap and removed the old tap washer, it’s time to choose the right replacement washer. Here’s what you need to consider:
- Types of washers: There are different types of tap washers available, such as rubber, silicone, or nylon. Check the old washer or consult a hardware store professional to determine the best type for your tap.
- Size and compatibility: Measure the diameter and thickness of the old washer to ensure you get the correct size. It’s crucial to choose a replacement tap washer that fits perfectly in the cartridge or valve assembly.
Remember, selecting the right replacement washer is essential for a successful repair. Taking the time to choose the correct type and size will ensure a proper fit and help resolve the leaking tap issue in your shower tap.
5. Installing the New Washer
With the replacement washer in hand, it’s time to install it in your shower tap and put an end to that pesky leak. Follow these steps:
- Proper placement and alignment: Carefully position the new tap washer in the same spot where the old washer was located. Ensure it sits securely and aligns properly with the valve seat.
- Securing the washer in place: If applicable, tighten the screw that holds the washer in position. Be cautious not to overtighten, as it may cause damage.
By installing the new tap washer correctly, you’re taking a significant step toward resolving the leak. Pay attention to the positioning and securing of the washer to ensure a watertight seal.
6. Reassembling the Shower Tap
With the new washer securely in place, it’s time to put your shower tap back together. Follow these tap assembly steps:
- Reattach the cartridge or valve assembly: Carefully insert the cartridge or valve assembly back into the tap body. Make sure it fits snugly and aligns properly.
- Reinstall the tap handle: Slide the tap handle back onto the assembly, aligning it with any grooves or indicators. If necessary, tighten the screw or cap to secure it in place.
By reassembling the tap correctly, you’re nearing the end of your repair journey. Take your time to ensure everything is properly aligned and tightened, and get ready to test for any remaining leaks.
7. Testing for Leaks
Congratulations on successfully reassembling your shower tap. Now, it’s time to test it for any lingering leaks.
Here’s what you need to do:
- Turning on the water supply: Slowly turn on the main water valve to restore water flow to the tap.
- Checking for leaks: Carefully observe the tap and its surroundings for any signs of leakage. Pay attention to the spout, handle, and any connection points.
If you notice any leaks, make sure all components are properly tightened. If the leaking tap persists, refer to the troubleshooting tips section. Otherwise, pat yourself on the back for a job well done and enjoy your leak-free shower tap.

Troubleshooting Tips
If you’ve followed the steps and still experience issues with your shower tap, don’t worry. Here are a few troubleshooting tips to help you address common problems:
Check for loose connections: Ensure all connections, including the cartridge or valve assembly and tap handle, are tightly secured.
Inspect for damaged parts: Examine the cartridge, valve assembly, or other components for signs of wear or damage. If necessary, replace any faulty parts.
Clean or remove debris: Sometimes, debris can cause leaks. Clean the components and remove any obstructions that might affect proper sealing.
If these troubleshooting steps don’t solve problem of a leaky tap, consider seeking a professional plumbing company. They can provide further guidance or recommend additional steps to resolve the problem.
All Sound Too Hard?
If you are unsure of how to safely and accurately dismantle your taps, it is best to call a qualified plumber to render assistance and fix your leaking shower tap. After all, it can be quite easy to make a simple job, such as a washer replacement, far more complex if you are unsure of the repair process.
Plumber Near Me is a tap specialist and can help you with all of your tap repairs and replacements. Call us when you’ve got a dripping tap and we’d be happy to assist you with any of your tap concerns. We carry an extensive range of replacement parts and fittings on board with us as well as a range of replacement taps for your convenience.
Unlike most standard plumbing companies, Plumber Near Me is open 24 hours a day 7 days a week. Have a plumbing emergency? We’ll get someone to you within the hour*.
We have years of experience in the tap industry and can provide you with accurate advice and workmanship to complete anything the job can throw at us. We even offer a range of finance options** for eligible customers.
We welcome the opportunity to send a plumber to repair, maintain or install your plumbing, gas fitting or hot water system now! Call the Plumber Near Me team to speak to one of our friendly call centre staff at any time, day or night.
Please note: This information is provided for advice purposes only. Regulations differ from state to state, so please consult your local authorities or an industry professional before proceeding with any work. See our Terms & Conditions here.